


目次
SSD_KerasをPepperにも
こんにちは。
AI coordinatorの清水秀樹です。
以前紹介したSSD_Kerasによる物体検出を、いつかPepperにも搭載できたら良いなぁなんて思っていました。
そしてこの度、アトリエ秋葉原に通い続けたことで何度も実装に苦戦しながらもついに実装することができたので、その内容をソースコードと合わせて紹介したいと思います。

物体検出ができるロボットの未来
ロボットが物体を検出できるようになれば、その情報から次のアクションが起こせるようになります。
- 人を見つけたら声をかける
- 物体を発見したら連絡する
- 特定の状況下になったら、写真を撮影して送信する
- 特定の人物にお声がけする
- 物体や人の数を数える
- etc・・・
特にPepperのようなロボットであれば、手軽に様々なことにチャレンジできるようになります。
というかできることなんて無限にあります。
人間も目から大量の情報を取得し行動を起こしています。
これがロボットでもできるようになれば、ロボティクスの分野は今後も大きく飛躍していくのではないかと筆者は考えているわけです。
相手を記憶して声をかけるといった人としての最低限の挨拶が、いままでのロボットでは容易にできませんでした。
これがDeepLearningの発展のおかげで特定の人物を認識できるようになったわけです。
(もちろん発展途上ですし、まだまだ課題はありますが・・・)
これまでのロボットには、人はロボットに対して特に感情を持つことなんてほとんど無かったのではないかと思います。
でも、
「お久しぶりです。XXXさん」
なんていきなり声をかけられたら、少し嬉しいですよね。
そして、そんな風に声をかけられた人にとってそのロボットは、きっとただのロボットではなくなるのではないかと思います。
ほんのすこしでもロボットに対して感情が生まれれば、ロボットはひろく受け入れられる存在になっていくのではないかと思っています。
・・・・
さて、前置きはこれくらいにして、実装方法を簡単に紹介していきたい思います。
開発環境
MacBook Pro(13-inch,2016)
プロセッサ 2.9 GHz intel Core i5
ubuntu 16.4 LTS
python 2.7.12
tensorflow-1.0.0
keras 1.2.2
OpenCV 3.2.0
pynaoqi-python2.7-2.5.5.5-linux64
Pepper実機
今回はubuntuで開発しています。
ubuntuの方がOpenCVのインストール慣れていたからです。
というかOSXだとうまくインストールできなかったからです。。。誰か教えて。
anacondaが使えれば楽勝なのですが、Pepper用python SDKがanacondaではなぜかエラーになってしまうためanacondaが使えません。
というわけでubuntuを使用しました。
あと言うまでもないかもしれませんが、バーチャルペッパーでは確認できません。
実機が必要になりますので、実機を持っていない方はアトリエ秋葉原に行くか、地方の方は近くのアトリエサテライトを探してみてください。

Pepperのカメラ画像をPCに表示できるようにする
最初の難関はこれになります。
紹介されているサイトも筆者の知る限りでは2つしかありませんでした。
これができないと話になりません。
なぜならSSD_KerasはPC上で実行するからです。
つまりカメラ映像をPCに映し出せないと先に進まないわけですね。
Pepperのカメラ映像をリアルタイムにPCに表示するやり方については、以下の記事を参考にしてください。
学習モデルの準備
これが一番大変です。
今回はSSD_Kerasで既に公開されている学習モデルをそのまま使用しました。
映像からの物体検出(SSD_Keras)に挑戦 for ubuntu
もし上戸彩さんがPepperの前にいれば、以前作成した美人女優を検出できる学習モデルを使用したのですが・・・

ソースコード
ツギハギでソースコードを作成しています。
不要なコードも残っていると思います。
ソースコードを綺麗にしていないので読み難くてもご容赦ください。
SSD_Kerasのソースコードを参考にしています。
# vim: set fileencoding=utf-8 :
import sys
import numpy as np
import cv2
from naoqi import ALProxy

import keras
from keras.applications.imagenet_utils import preprocess_input
from keras.backend.tensorflow_backend import set_session
from keras.models import Model
from keras.preprocessing import image
import matplotlib.pyplot as plt
import numpy as np
from scipy.misc import imread
import tensorflow as tf

from ssd import SSD300
from ssd_utils import BBoxUtility

%matplotlib inline
plt.rcParams['figure.figsize'] = (8, 8)
plt.rcParams['image.interpolation'] = 'nearest'

np.set_printoptions(suppress=True)

config = tf.ConfigProto()
config.gpu_options.per_process_gpu_memory_fraction = 0.45
set_session(tf.Session(config=config))

class_names = [クラス名を指定]
NUM_CLASSES = len(class_names)

input_shape=(300, 300, 3)
model = SSD300(input_shape, num_classes=NUM_CLASSES)
model.load_weights(学習モデルを指定, by_name=True)
bbox_util = BBoxUtility(NUM_CLASSES)

class_names = class_names
num_classes = len(class_names)
model = model
input_shape = input_shape
bbox_util = BBoxUtility(num_classes)

class_colors = []
for i in range(0, num_classes):
    # This can probably be written in a more elegant manner
    hue = 255*i/num_classes
    col = np.zeros((1,1,3)).astype("uint8")
    col[0][0][0] = hue
    col[0][0][1] = 128 # Saturation
    col[0][0][2] = 255 # Value
    cvcol = cv2.cvtColor(col, cv2.COLOR_HSV2BGR)
    col = (int(cvcol[0][0][0]), int(cvcol[0][0][1]), int(cvcol[0][0][2]))
    class_colors.append(col)

# get NAOqi module proxy
videoDevice = ALProxy('ALVideoDevice', IPアドレス,ポート番号を指定)
videoDevice.unsubscribe('test')

# subscribe top camera
AL_kTopCamera = 0
AL_kQVGA = 2  # {0 = kQQVGA, 1 = kQVGA, 2 = kVGA}
AL_kBGRColorSpace = 13 # {0 = kYuv, 9 = kYUV422, 10 = kYUV, 11 = kRGB, 12 = kHSY, 13 = kBGR}
fps = 5 # {5, 10, 15, 30}
nameID = 'test'
captureDevice = videoDevice.subscribeCamera(
    nameID, AL_kTopCamera, AL_kQVGA, AL_kBGRColorSpace, fps)

# create image
width = 640
height = 480
frame = np.zeros((height, width, 3), np.uint8)

while True:

    # get image
    result = videoDevice.getImageRemote(captureDevice);
    frame = np.zeros((height, width, 3), np.uint8)

    if result == None:
        print 'cannot capture.'
    elif result[6] == None:
        print 'no frame data string.'
    else:

        # translate value to mat
        values = map(ord, list(result[6]))
        i = 0
        for y in range(0, height):
            for x in range(0, width):
                frame.itemset((y, x, 0), values[i + 0])
                frame.itemset((y, x, 1), values[i + 1])
                frame.itemset((y, x, 2), values[i + 2])
                i += 3

        #cv2.imwrite("input.jpg",frame)

        inputs = []
        images = []

        img = cv2.resize(frame, (300,300))

        img = image.img_to_array(img)
        images.append(frame)
        inputs.append(img.copy())
        inputs = preprocess_input(np.array(inputs))

        preds = model.predict(inputs, batch_size=1, verbose=1)

        results = bbox_util.detection_out(preds)


        %%time
        a = model.predict(inputs, batch_size=1)
        b = bbox_util.detection_out(preds)

        for i, img in enumerate(images):
            # Parse the outputs.
            det_label = results[i][:, 0]
            det_conf = results[i][:, 1]
            det_xmin = results[i][:, 2]
            det_ymin = results[i][:, 3]
            det_xmax = results[i][:, 4]
            det_ymax = results[i][:, 5]

            # Get detections with confidence higher than 0.6.
            top_indices = [i for i, conf in enumerate(det_conf) if conf >= 0.6]

            top_conf = det_conf[top_indices]
            top_label_indices = det_label[top_indices].tolist()
            top_xmin = det_xmin[top_indices]
            top_ymin = det_ymin[top_indices]
            top_xmax = det_xmax[top_indices]
            top_ymax = det_ymax[top_indices]

            colors = plt.cm.hsv(np.linspace(0, 1, 21)).tolist()

            plt.imshow(img / 255.)
            currentAxis = plt.gca()

            for i in range(top_conf.shape[0]):
                xmin = int(round(top_xmin[i] * img.shape[1]))
                ymin = int(round(top_ymin[i] * img.shape[0]))
                xmax = int(round(top_xmax[i] * img.shape[1]))
                ymax = int(round(top_ymax[i] * img.shape[0]))
                score = top_conf[i]
                label = int(top_label_indices[i])
                label_name = class_names[label]

                class_num = int(top_label_indices[i])
                cv2.rectangle(frame, (xmin, ymin), (xmax, ymax),
                                class_colors[class_num], 2)
                text = class_names[class_num] + " " + ('%.2f' % top_conf[i])

                text_top = (xmin, ymin-10)
                text_bot = (xmin + 80, ymin + 5)
                text_pos = (xmin + 5, ymin)
                cv2.rectangle(frame, text_top, text_bot, class_colors[class_num], -1)
                cv2.putText(frame, text, text_pos, cv2.FONT_HERSHEY_SIMPLEX, 0.35, (0,0,0), 1)

                #print(label)
                #print(label_name)

        cv2.imshow("pepper-camera-deeplearning", frame)

    k = cv2.waitKey(10);
    if k == ord('q'):  break;

videoDevice.unsubscribe(nameID)
クラス名や学習モデルを指定すれば、上記ソースコードそのままで動くはずです。

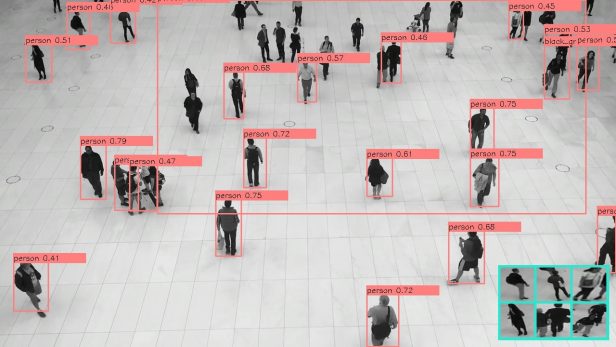
無事に目標物が検出されれば、ひとまず成功です。
今後のPepperの可能性について
冒頭でも述べた通り、筆者としてはPepperが物体検出をできるようになったことで、次のアクションを容易に選択できるようになったと考えています。
そのため、検出した物体に合わせた次のアクションに繋げることができることで、アプリ作成の幅が大きく広がりを見せた気がします。
筆者も次のアクションを起こせるPepperを開発していきたいと思います。
興味がある方はぜひチャレンジして、色々なアプリケーションに組み込んでみてください。
また、これからDeep Learningの勉強をするなら、こちらで紹介する書籍も参考になりますので一読してみることをオススメします。

その他のPepperアプリ記事はこちらから
それではまた。


この記事へのコメントはありません。