
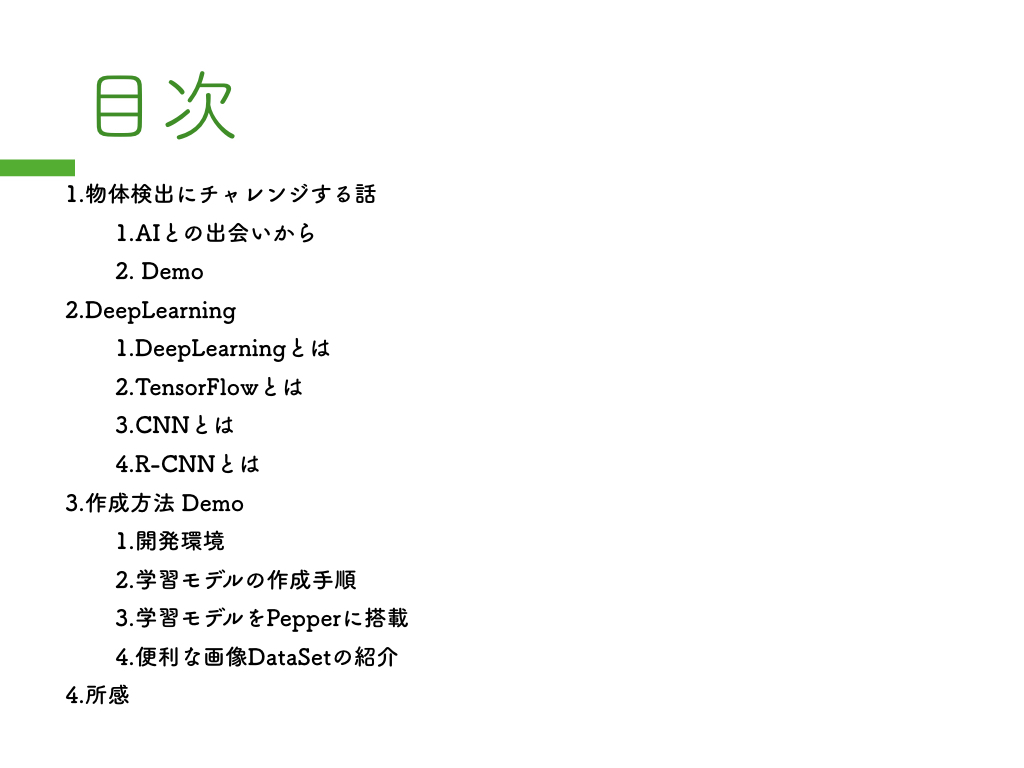
目次
アトリエ秋葉原で勉強会を開催
こんにちは。
AI coordinatorの清水秀樹です。
アトリエ秋葉原で勉強会の講師を努めさせて頂きました。
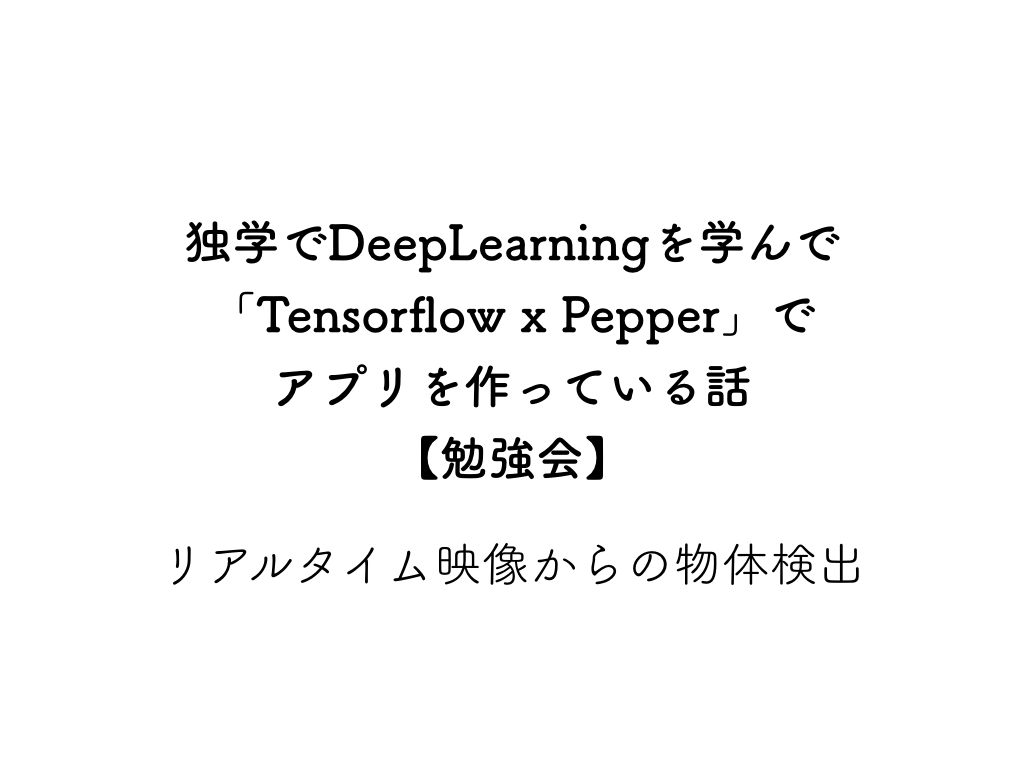
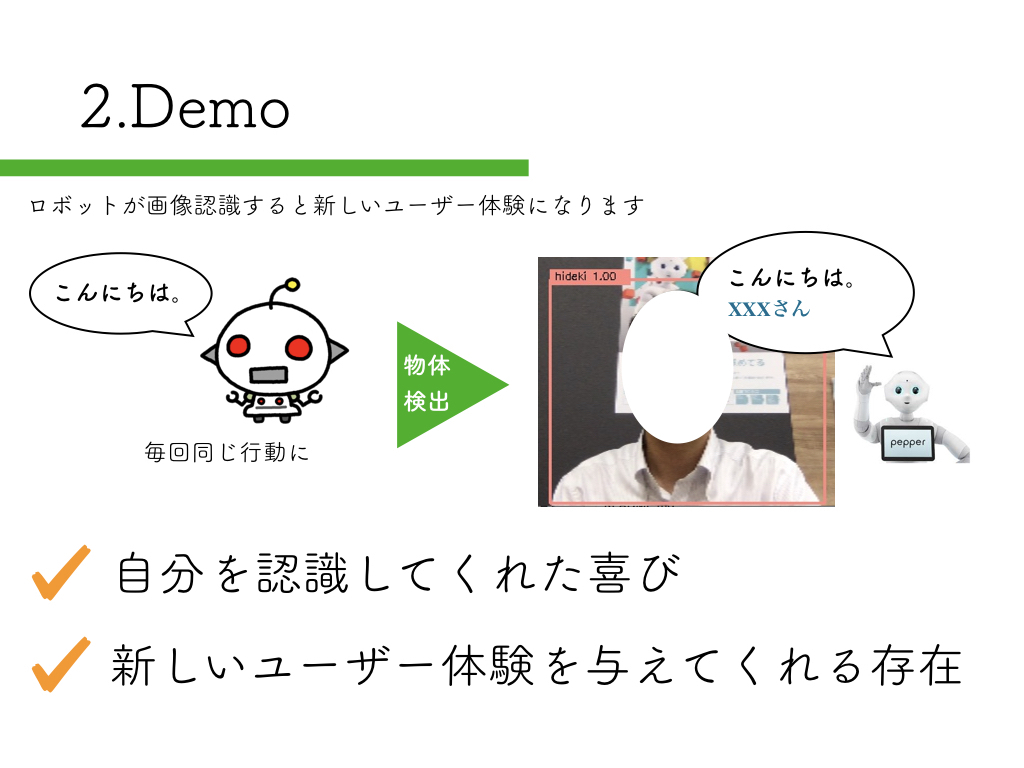
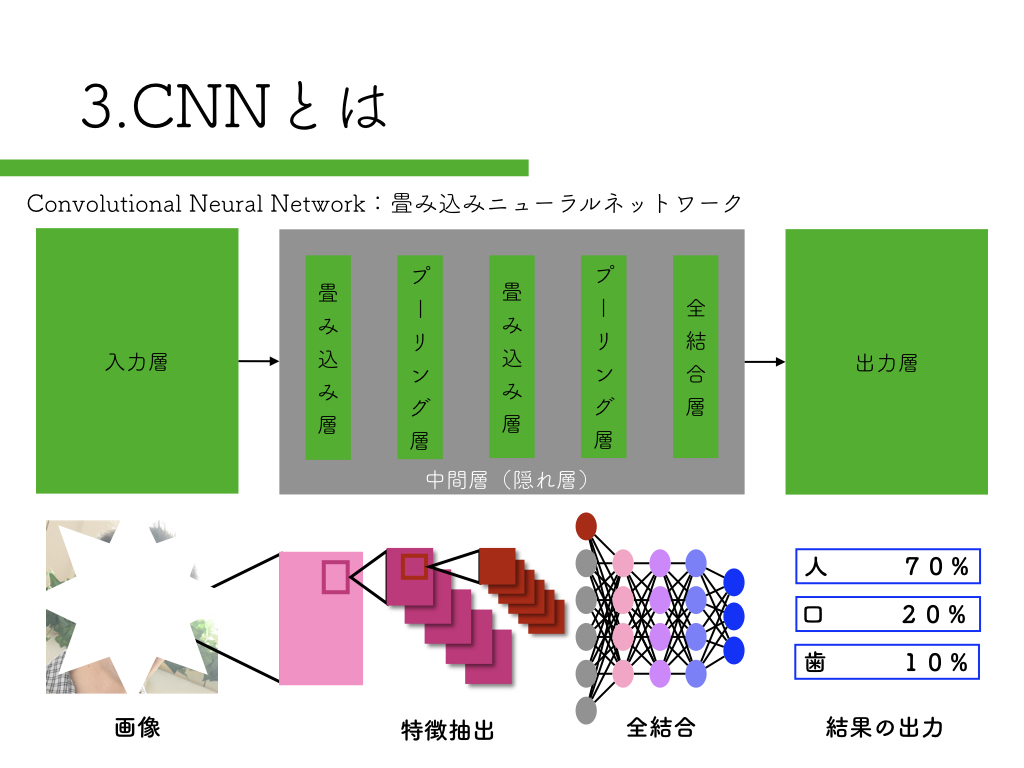
独学でDeepLearningを学んで「Tensorflow x Pepper」でアプリを作っている話【勉強会】
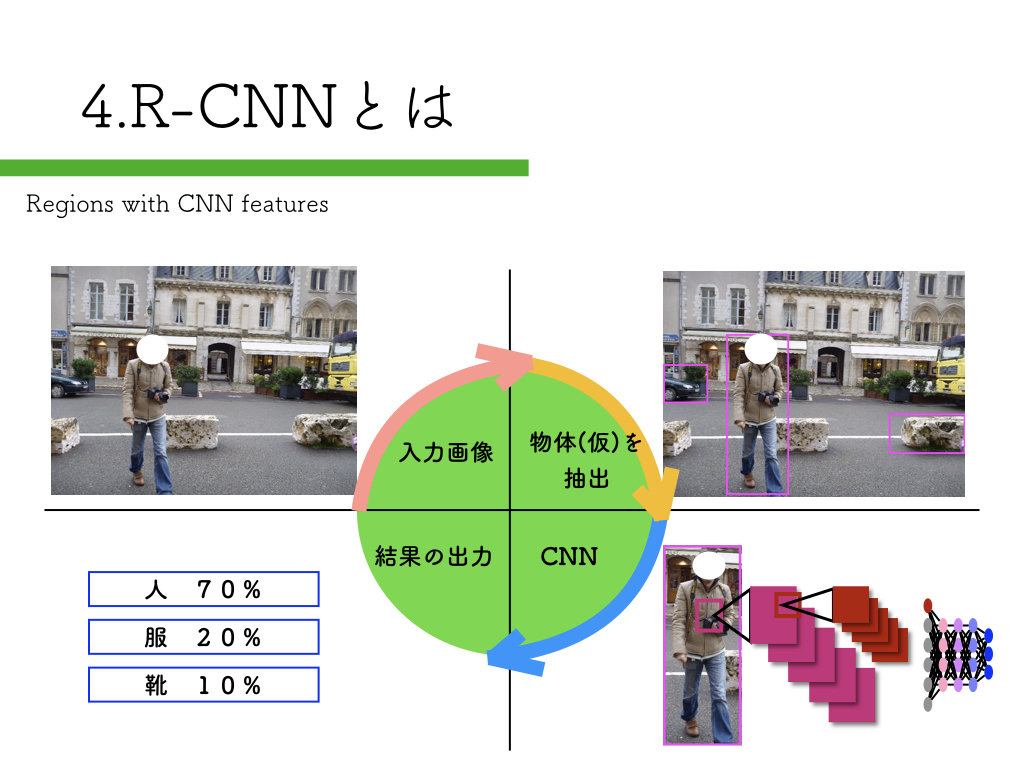
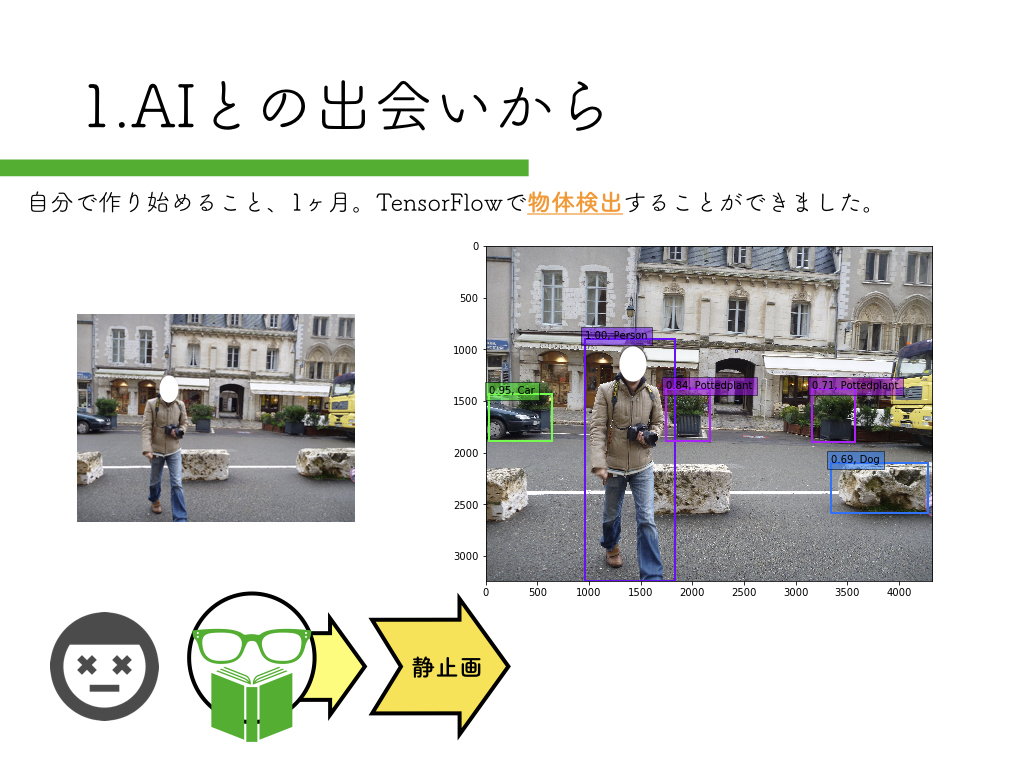
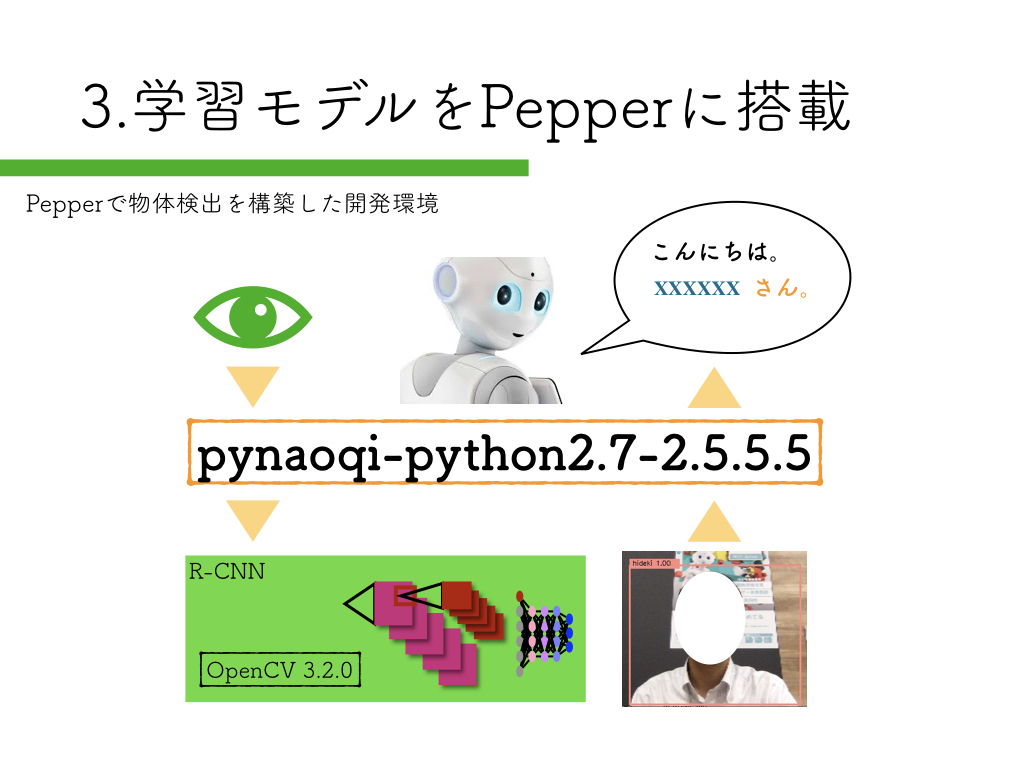
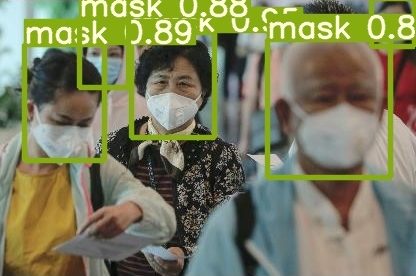
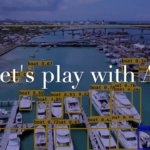
R-CNNを使った物体検出をPepperで試してみたという内容です。
その時に使用したスライドとソースコードをまとめて紹介します。
参考にして頂けたらと思います。
スライドショーの紹介
keynoteでの作成は今回初めてでした。


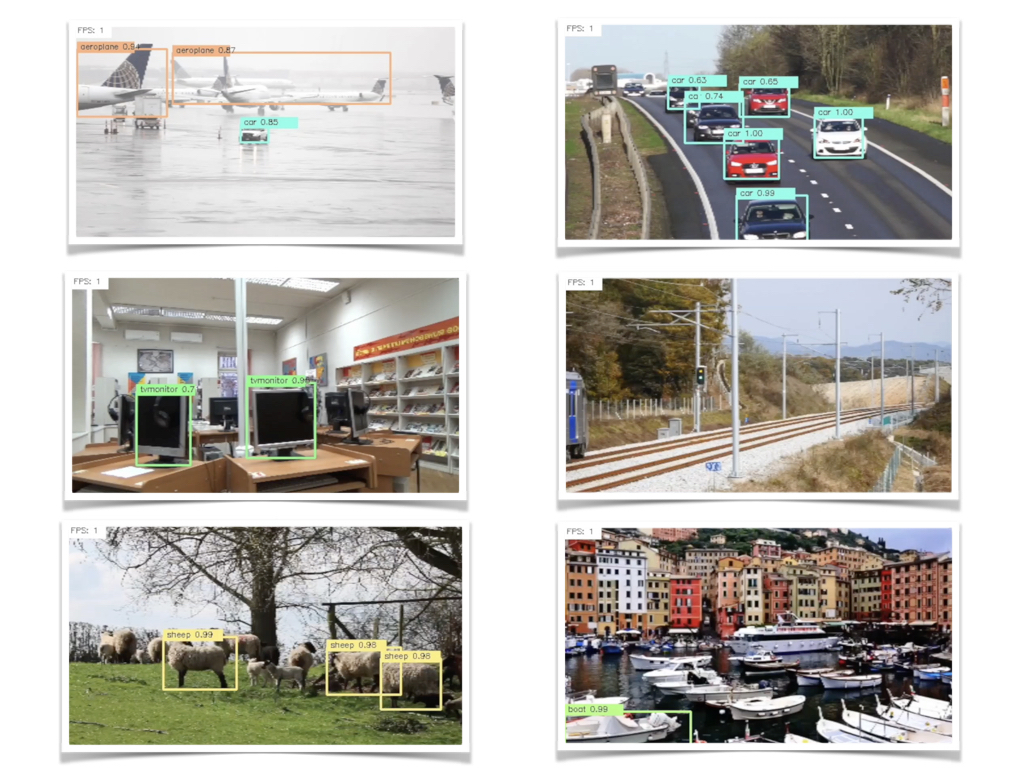


R-CNN:物体検出入門編
いきなりペッパーから始めるのはハードルが高いので、まずは自宅のPCで物体検出にチャレンジしてみましょう。
以下の記事で、物体検出をローカル環境で実装する方法を紹介しています。
映像からの物体検出(SSD_Keras)に挑戦 for ubuntu
映像物体検出(SSD_Keras)を簡単に実装する方法 for maxOS
ubuntu用とmac用それぞれで試せます。
macの方が準備は簡単です。
ただ、anacondaではPepper SDKが使えないので、そこを知った上で試してみてください。
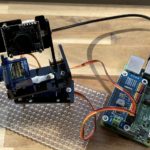
デモで使用したソースコードの紹介
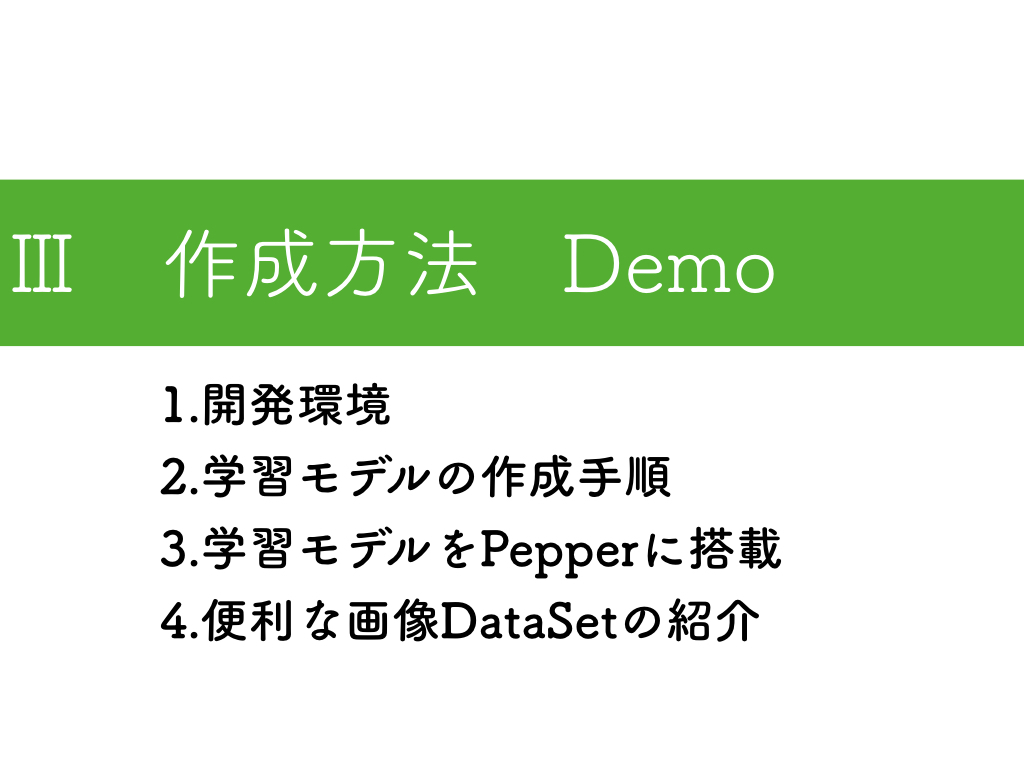
開発環境はスライドで紹介していますので、ここでは省略します。
公開済み学習モデルでR-CNNを実装したペッパーサンプル
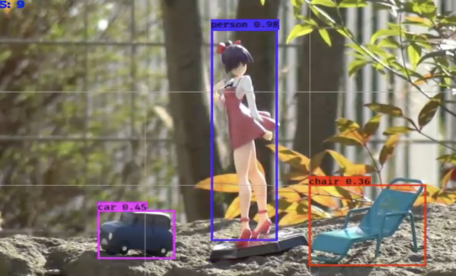
DeepLearningを活用した物体検出(SSD_Keras)を可能とするPepper
こちらの記事で紹介した内容を、そのままデモで使用しています。
物体検出の精度がとても高いので、初めはこれからチャレンジして感覚を掴んでもらった方が良いかと思います。
R-CNNを使った美人女優を検出できるペッパーのソースコード
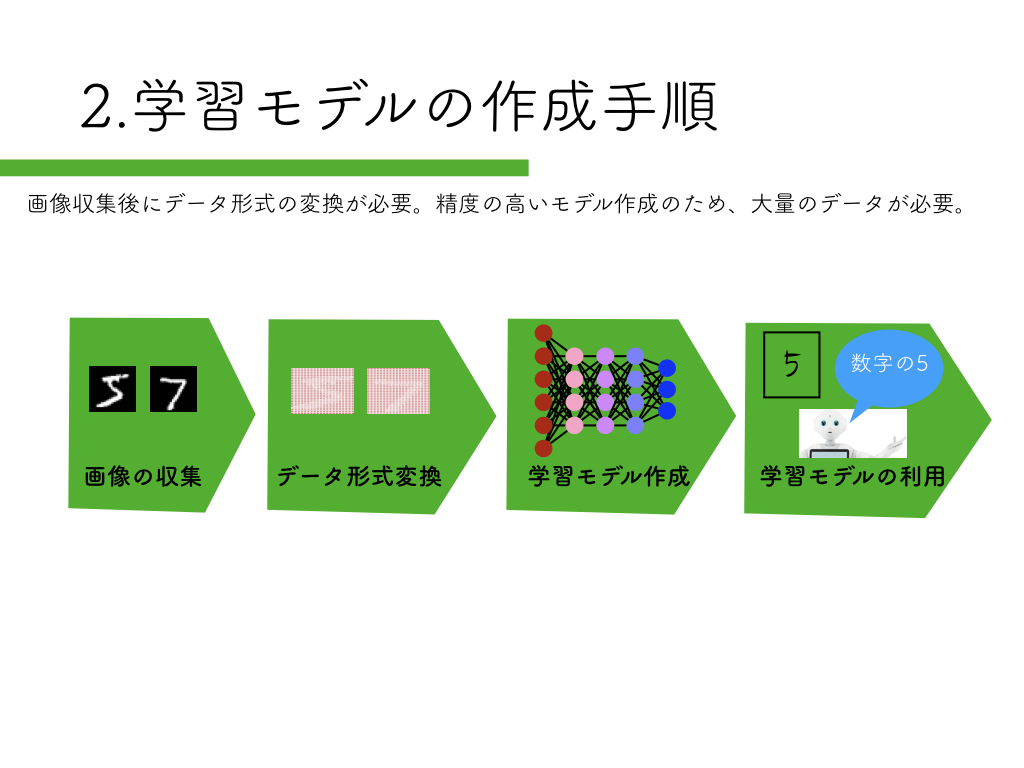
学習モデルの作成方法は、
「Tensorflowで映像からの美人女優顔検出学習モデルの見直し」の記事を参考にしてください。
R-CNNを実装するにはOpenCVのカスケードファイルが必要になりますので、
「簡単にできるOpenCVを使った顔検出」の記事も合わせてご確認ください。
Slackに画像をアップロードする方法は、
「監視カメラで撮影した画像を自動でSlackにアップロードする方法」が参考になるかと思います。
そして以下のソースコードがPepperでR-CNNを実装した時のソースコードになります。
# vim: set fileencoding=utf-8 :
import sys, os
from keras.preprocessing.image import load_img, img_to_array
import numpy as np
import cv2
import time
from keras.models import model_from_json
from naoqi import ALProxy
from slacker import Slacker

from datetime import datetime

# get NAOqi module proxy
ip = "192.168.11.5"
port = 9559
videoDevice = ALProxy('ALVideoDevice', ip, port)
tts = ALProxy('ALTextToSpeech',ip,port)

# subscribe top camera
AL_kTopCamera = 0
AL_kQVGA = 2  # {0 = kQQVGA, 1 = kQVGA, 2 = kVGA}
AL_kBGRColorSpace = 13 # {0 = kYuv, 9 = kYUV422, 10 = kYUV, 11 = kRGB, 12 = kHSY, 13 = kBGR}
fps = 10 # {5, 10, 15, 30}

nameID = 'test14'
captureDevice = videoDevice.subscribeCamera(
    nameID, AL_kTopCamera, AL_kQVGA, AL_kBGRColorSpace, fps)
videoDevice.unsubscribe(nameID)

# create image
pepper_width = 640
pepper_height = 480
frame = np.zeros((pepper_height, pepper_width, 3), np.uint8)

# カスケードファイルの指定
cascade_path = "./haarcascades/haarcascade_frontalface_alt.xml"
cascade = cv2.CascadeClassifier(cascade_path)
cam = cv2.VideoCapture(0)
color = (255, 0, 255)

#学習モデルの定義
image_size = 32
categories = ["aya ueto", "ayame gouriki", "mayu watanabe", "nozomi sasaki","yui aragaki"]

#使用する学習モデルを指定する
keras_model = "./idol_makedata/idol.json"
keras_param = "./idol_makedata/idol-model.hdf5"

#学習モデルの読み込み
model = model_from_json(open(keras_model).read())
model.load_weights(keras_param)
model.summary()

def slack(interval,last_time):
    #撮影は2秒以上の間隔で撮影
    now = datetime.now()
    fntime = lambda n : int(n.strftime('%S'))
    sec = fntime(now) - fntime(last_time)

    if sec < 0:
        sec = sec * -1

    if sec > interval:
        #動いている物体の画像を保存する
        f = now.strftime('%Y-%m-%d-%H-%M-%S') + ".jpg"
        cv2.imwrite(f,frame)
        last_time = now

        #Slackにアップロードする
        token = "xxxxxxxxxxxxxxxxxxxxxxxxxxxxxxxxxxxxxxxxxxxxxxxxxxxxx"
        slacker = Slacker(token)
        channel_name = "#" + "general"
        result = slacker.files.upload(f, channels=['xxxxxxxxxxx'])

def main():

    #写真撮影用初期パラメータ/2秒以上の間隔で撮影
    last_time = datetime.now()
    print(last_time)
    interval = 3


    while(True):

        # get image
        result = videoDevice.getImageRemote(captureDevice);

        if result == None:
            print 'cannot capture.'
        elif result[6] == None:
            print 'no image data string.'
        else:
            # translate value to mat
            values = map(ord, list(result[6]))
            i = 0
            for y in range(0, pepper_height):
                for x in range(0, pepper_width):
                    frame.itemset((y, x, 0), values[i + 0])
                    frame.itemset((y, x, 1), values[i + 1])
                    frame.itemset((y, x, 2), values[i + 2])
                    i += 3

        %%time
        #顔の検出
        facerect = cascade.detectMultiScale(frame, scaleFactor=1.3, minNeighbors=2, minSize=(10, 10))

        for rect in facerect:
            x = rect[0]
            y = rect[1]
            width = rect[2]
            height = rect[3]

            cv2.imwrite("frontalface.png", frame)
            img = cv2.imread("frontalface.png")

            dst = img[y:y+height, x:x+width]
            cv2.imwrite("output.png", dst)
            cv2.imread("output.png")
            X = []

            img = load_img("./output.png", target_size=(image_size,image_size))
            in_data = img_to_array(img)

            X.append(in_data)
            X = np.array(X)
            X  = X.astype("float")  / 256

            pre = model.predict(X)
            #print(pre)

            if pre[0][0] > 0.99:
                #aya ueto 学習モデル失敗 原因不明
                print(categories[0],pre[0][0])
                #text = categories[0]
                #font = cv2.FONT_HERSHEY_PLAIN
                #cv2.putText(frame,text,(rect[0],rect[1]-10),font, 2, color, 2, cv2.LINE_AA)

            elif pre[0][1] > 0.99:
                #ayame gouriki
                print(categories[1],pre[0][1])
                text = categories[1]
                font = cv2.FONT_HERSHEY_PLAIN
                cv2.rectangle(frame, tuple(rect[0:2]),tuple(rect[0:2] + rect[2:4]), color, thickness=2)
                cv2.putText(frame,text,(rect[0],rect[1]-10),font, 2, color, 2, cv2.LINE_AA)

                #認識した物体をPepperに喋らせる
                tts.say('おひさしぶりです     ごうりきあやめさん')

                slack(interval,last_time)

            elif pre[0][2] > 0.99:
                #mayu watanabe
                print(categories[2],pre[0][2])
                text = categories[2]
                font = cv2.FONT_HERSHEY_PLAIN
                cv2.rectangle(frame, tuple(rect[0:2]),tuple(rect[0:2] + rect[2:4]), color, thickness=2)
                cv2.putText(frame,text,(rect[0],rect[1]-10),font, 2, color, 2, cv2.LINE_AA)

                #認識した物体をPepperに喋らせる
                tts.say('わたなべまゆさん     このあいだは     ありがとうございました')

                slack(interval,lastqqq_time)

            elif pre[0][3] > 0.99:
                #nozomi sasaki
                print(categories[3],pre[0][3])
                text = categories[3]
                font = cv2.FONT_HERSHEY_PLAIN
                cv2.rectangle(frame, tuple(rect[0:2]),tuple(rect[0:2] + rect[2:4]), color, thickness=2)
                cv2.putText(frame,text,(rect[0],rect[1]-10),font, 2, color, 2, cv2.LINE_AA)

                #認識した物体をPepperに喋らせる
                tts.say('ささきのぞみさん     こんどあそびにいきましょう')

                slack(interval,last_time)

            elif pre[0][4] > 0.99:
                #yui aragaki
                print(categories[4],pre[0][4])
                text = categories[4]
                font = cv2.FONT_HERSHEY_PLAIN
                cv2.rectangle(frame, tuple(rect[0:2]),tuple(rect[0:2] + rect[2:4]), color, thickness=2)
                cv2.putText(frame,text,(rect[0],rect[1]-10),font, 2, color, 2, cv2.LINE_AA)

                #認識した物体をPepperに喋らせる
                tts.say('あらがきゆいさん     げんきですか')

                slack(interval,last_time)

        cv2.imshow("pepper-top-camera-320x240", frame)
        time.sleep(0.1)

        k = cv2.waitKey(1)

        if k == ord('q'):
            break

    videoDevice.unsubscribe(nameID)

    cam.release()
    cv2.destroyAllWindows()

if __name__ == '__main__':
    main()
SlackからのPepper操作
SlackからPepperを操作した時のソースコードは、
「SlackからPepperを発話させる超簡単な方法」の記事を参考にしてください。
実際の発表では、SlackからPepperのモーションを使うことで、左右にPepperを動かしてみました。
その時のソースコードも紹介しておきます。
# coding: utf-8

from slackbot.bot import default_reply
import os, re, json, random
from naoqi import ALProxy
# 入力メッセージを取得し、pepperに喋らせる
@default_reply()
def default_func(message):
    text = message.body['text'].encode('utf-8')     # メッセージを取り出す
    ip = "192.168.100.31"
    port = 9559

    motion = ALProxy("ALMotion", ip, port)
    tts = ALProxy("ALTextToSpeech", ip, port)

    if text == '前':
        motion.moveTo(0.5, 0.0, 0.0)
    elif text == '後':
        motion.moveTo(-0.5, 0.0, 0.0)
    elif text == '右':
        motion.moveTo(0.0, -0.5, 0.0)
    elif text == '左':
        motion.moveTo(0.0, 0.5, 0.0)
    else:
        tts.setLanguage("Japanese")
        say = text
        tts.say(say)
類義語を出力するword2vec
wikipediaを学習した類義語を話すSlackbotの作成方法
類義語を話すPepperを作ってみることもできます。
物体検出する方法の考察
今回は物体を検出する方法にOpecCVのカスケードファイルを使用しました。
そこで抽出した画像と学習モデルをぶつけてR-CNNを実装しています。
物体を検出する方法の一つとして、
「カメラ映像から動く物体の輪郭検出が簡単にできた話」の記事で紹介した内容をデモで実施させて頂きました。
R-CNNの難しいところは、物体らしき領域をどうやって抽出してくるか?
これがうまくできるようになると、物体検出の精度も大幅に上がってくるかと思います。
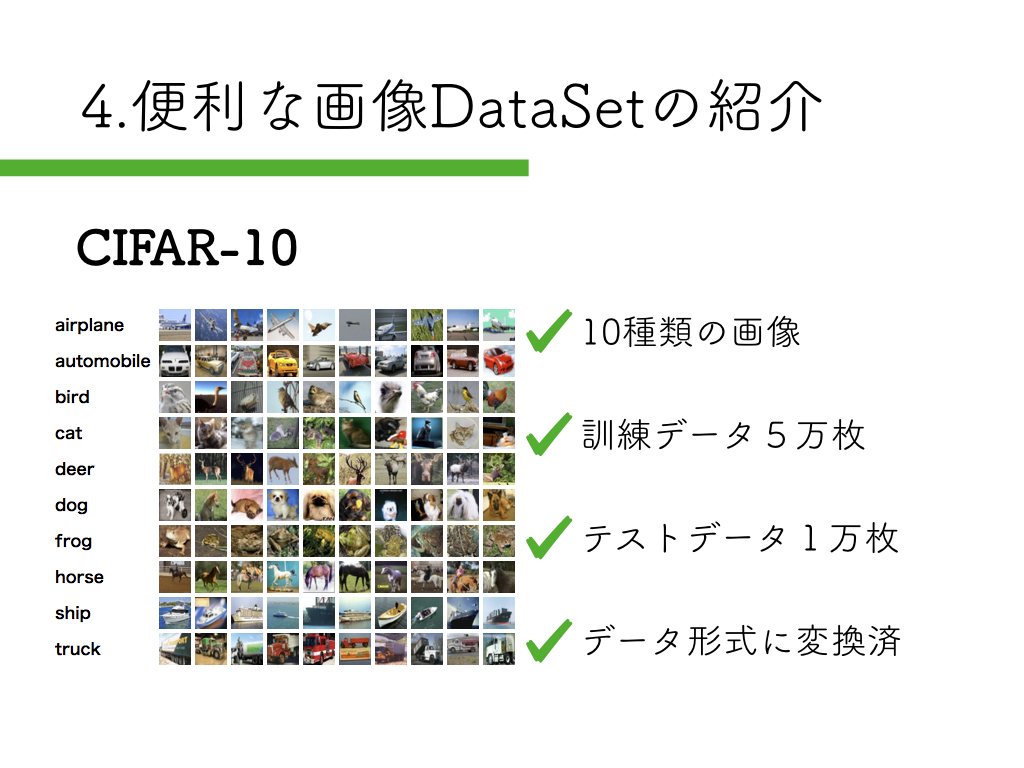
Cifar10の紹介
DeepLearningを手っ取り早く始められる画像データセットを紹介させて頂きました。
DeepLearningのモデル可視化方法とmatplotlibで学習の様子を可視化する方法
簡単に学習モデルの作成が試せるのでおすすめです。
最後に
誰か一緒にビジネス関係なくPepperアプリ開発しませんかぁ〜?
それではまた。

その他のPepperアプリ記事はこちらから


この記事へのコメントはありません。