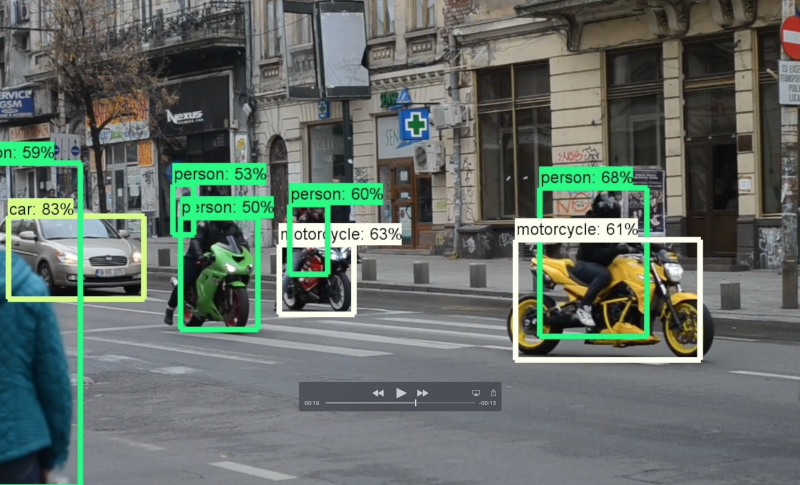


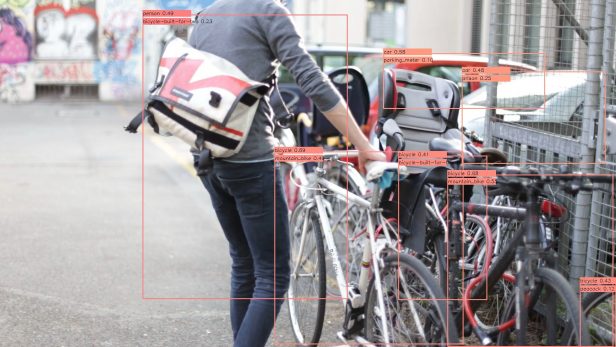
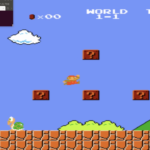
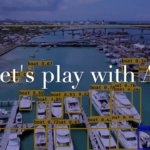
物体検出を静止画から動画でもできるようにしてみました。
こんにちは。
AI coordinatorの清水秀樹です。
Tensorflow object detectionも中々精度が高いと評判でしたので、以前はtutorialに従った静止画での物体検出を実施してみましたが、今回動画でもできるようにカスタマイズしたので紹介します。
開発環境の準備については以下の記事を参考にしてください。
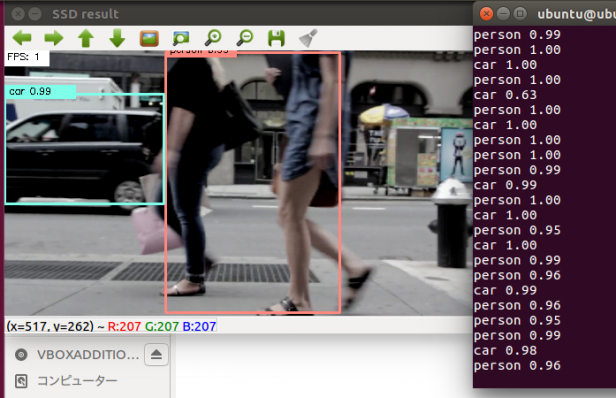
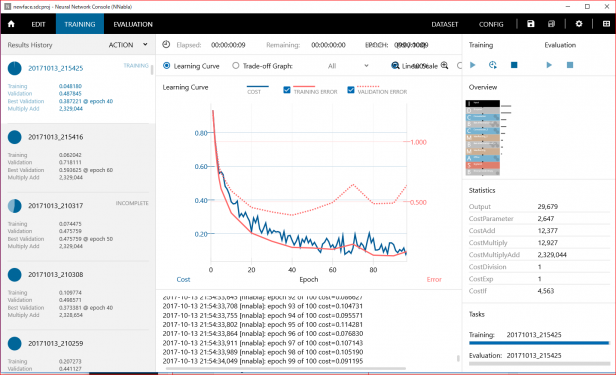
また物体検出にチャレンジしてみたくて当記事に訪れた方は、以下の記事も参考になるかと思います。
いずれも精度の高い学習モデルを使用しています。
Pythonソースコードの紹介
ソースコードは以下の通りになります。
OpenCVを使えば簡単にTensorflow object detectionを使ったリアルタイム映像(WEBカメラや動画)からの物体検出にチャレンジできます。
import numpy as np
import os
import six.moves.urllib as urllib
import sys
import tarfile
import tensorflow as tf
import zipfile

from collections import defaultdict
from io import StringIO
from matplotlib import pyplot as plt
from PIL import Image

# This is needed to display the images.
%matplotlib inline

# This is needed since the notebook is stored in the object_detection folder.
sys.path.append("..")

from utils import label_map_util
from utils import visualization_utils as vis_util

# What model to download.
MODEL_NAME = 'ssd_mobilenet_v1_coco_11_06_2017'
MODEL_FILE = MODEL_NAME + '.tar.gz'
DOWNLOAD_BASE = 'http://download.tensorflow.org/models/object_detection/'

# Path to frozen detection graph. This is the actual model that is used for the object detection.
PATH_TO_CKPT = MODEL_NAME + '/frozen_inference_graph.pb'

# List of the strings that is used to add correct label for each box.
PATH_TO_LABELS = os.path.join('data', 'mscoco_label_map.pbtxt')

NUM_CLASSES = 90

opener = urllib.request.URLopener()
opener.retrieve(DOWNLOAD_BASE + MODEL_FILE, MODEL_FILE)
tar_file = tarfile.open(MODEL_FILE)
for file in tar_file.getmembers():
    file_name = os.path.basename(file.name)
    if 'frozen_inference_graph.pb' in file_name:
        tar_file.extract(file, os.getcwd())

detection_graph = tf.Graph()
with detection_graph.as_default():
    od_graph_def = tf.GraphDef()
    with tf.gfile.GFile(PATH_TO_CKPT, 'rb') as fid:
        serialized_graph = fid.read()
        od_graph_def.ParseFromString(serialized_graph)
        tf.import_graph_def(od_graph_def, name='')

label_map = label_map_util.load_labelmap(PATH_TO_LABELS)
categories = label_map_util.convert_label_map_to_categories(label_map, max_num_classes=NUM_CLASSES, use_display_name=True)
category_index = label_map_util.create_category_index(categories)

#------------------------以下、大きく修正-------------------------------------------------------------------

import cv2

cap = cv2.VideoCapture("1.mp4")
height = 720
width  = 1280

def main():
    while(True):

        # 動画ストリームからフレームを取得
        ret, frame = cap.read()

        # カメラ画像をリサイズ
        image_np = cv2.resize(frame,(width,height))

        with detection_graph.as_default():
            with tf.Session(graph=detection_graph) as sess:
                image_np_expanded = np.expand_dims(image_np, axis=0)
                image_tensor = detection_graph.get_tensor_by_name('image_tensor:0')
                # Each box represents a part of the image where a particular object was detected.
                boxes = detection_graph.get_tensor_by_name('detection_boxes:0')
                # Each score represent how level of confidence for each of the objects.
                # Score is shown on the result image, together with the class label.
                scores = detection_graph.get_tensor_by_name('detection_scores:0')
                classes = detection_graph.get_tensor_by_name('detection_classes:0')
                num_detections = detection_graph.get_tensor_by_name('num_detections:0')
                # Actual detection.
                (boxes, scores, classes, num_detections) = sess.run(
                    [boxes, scores, classes, num_detections],
                    feed_dict={image_tensor: image_np_expanded})
                # Visualization of the results of a detection.
                vis_util.visualize_boxes_and_labels_on_image_array(
                    image_np,
                    np.squeeze(boxes),
                    np.squeeze(classes).astype(np.int32),
                    np.squeeze(scores),
                    category_index,
                    use_normalized_coordinates=True,
                    line_thickness=8)

        cv2.imshow("camera window", image_np)

        # escを押したら終了。
        if cv2.waitKey(1) == 27:
            break

    #終了
    cap.release()
    cv2.destroyAllWindows()


if __name__ == '__main__':
    main()
フォントサイズを大きくする方法
初期状態はではフォントサイズが小さすぎて、ラベルの内容が読み取れませんでした。

このラベルのフォントサイズをなんとか変更できないかと考えていたところ、フォントサイズを大きくする方法を教えてくださった方がいて、なんとか見える形に変更できたので、紹介したいと思います。
ただし、macの場合に限ります。
object_detection > utils > visualization_utils.pyの160行目を編集することでフォントサイズを変更することができます。
font = ImageFont.truetype('arial.ttf', 24)
を、
font = ImageFont.truetype('/library/fonts/arial.ttf', 24)
に変更してみましょう。
たったこれだけでフォントサイズを変更できます。
分かってしまえば何てことないのですが、これに辿り着くまでが大変ですね。
最近は色々な物体検出技術が登場してきています。
そして筆者のような素人でも簡単に実装できる時代が来ています。
ぜひ、興味がある方はチャレンジしてみてください。
それでまた。

その他の物体検出記事はこちらから


この記事へのコメントはありません。